If you don’t know how to capture a Screenshot in a Mac, This article will be helpful for you. You can use a number of various methods to do so. Isn’t it interesting? We have already posted the Article for Capturing screenshot in Windows OS. Which you check out here. You are familiar with the use of the Snipping Tool which can help you to make changes or notes, then save, and share, etc. Check Out More…

So, hey guys What’s up. It’s me Rishabh back with another Tech Tutorial by Trenovision. In this article, we will learn how to Take a Screenshot on Mac. Right! So, without wasting any more time, let’s get into it. And, I will recommend you to read it to the end for a better understanding.
Table of Contents
HIGHLIGHTS :
- Ways To Take Screenshot.
- Tips and Tricks One can Use.
- How to use Keyboard Shortcut Keys to capture a screenshot?
- And many more, just stay connected with us.
Take Screenshot In A Mac:
There are different methods by which one can easily screen capture different screens or active windows in a Mac. We have earlier discuss some basic methods to capture a screenshot in a different versions of Windows OS, such as Windows 7 and 10. If you haven’t checked out that. Must check out that as well, if your windows by visiting Trenovision.com. We’ll go through the steps one by one, which are as follows :
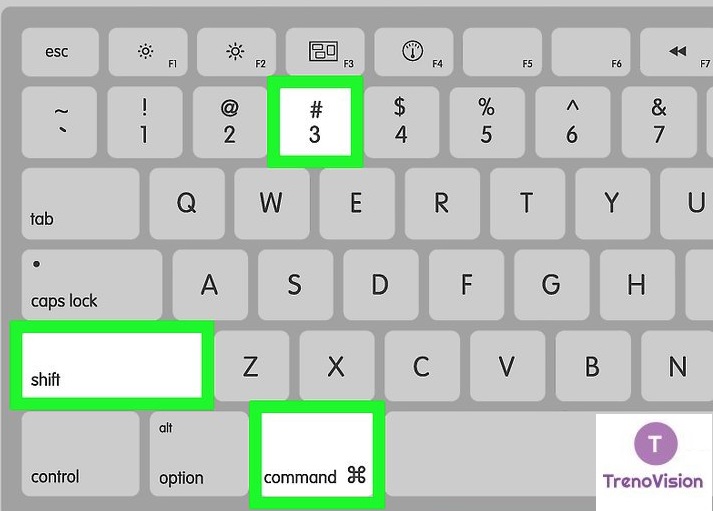
- Capture the Entire Screen, Using Shortcut Keys in your Keyboard.
You have to hold down ⌘ Key in your keyboard and simultaneously press SHIFT and 3. That’s it, by doing so it will automatically capture your screen and will prompt you with the option to save it or not. Then, just save it by any name you wish.
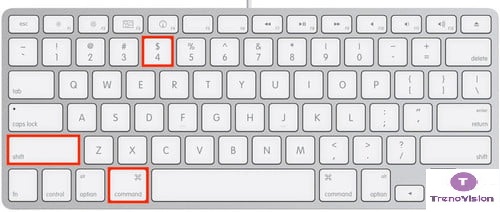
- Only a specific portion or part of the screen.
To do so, just press this combination of keys on your keyboard, Command – Shift – 4. Now, after then select the area which you want to save as a screenshot. And, that’s it. Further, you can save it on your desktop or in any folder.
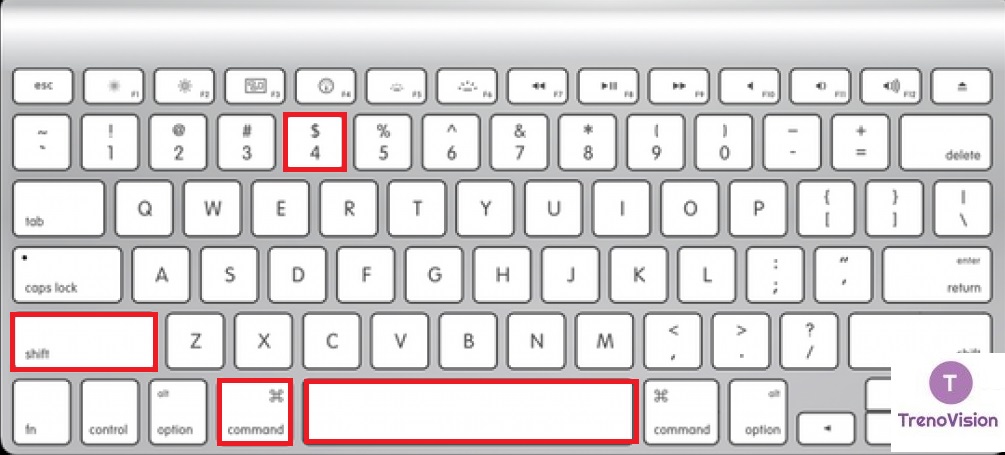
- Specific application window.
Sometimes, users need only a snap of a particular software that is active or running. They don’t know how to do so. Here’s the Method, just press and hold Command – Shift – 4, then click Spacebar. Now, your cursor will suddenly change to a camera, and now you can easily move it around the screen. As you move the cursor over an application window, the windows will be highlighted and, you can save it now.
For More Information :
Check out the below YoutTube video, I have found out for you. If you want to gain extra knowledge. Must check out the below video…
Conclusion :
Talking about these methods is global. Which means approx. 99% of people can use it. And, it will surely work for them. Why? You know better than me because some users have different keyboards that don’t support such functions. But, don’t worry about that, those keyboards were of 20 centuries. So that’s all for today guys we will meet you in another Tech article. If you haven’t subscribed newsletter kindly go for it. Till then goodbye…
Thanks for reading…