Android 10 is the 10th version of Android operating system. Moreover, According to a report, the first beta was under the preliminary name “Android Q” . But, on August 22, 2019, it was officially rebranded as Android 10, thus ending the practice of naming major versions after desserts. Yeah! that’s true. Moreover, This is the guide to install this Custo ROM.
![]()
Given article will cover all the aspects related to the topic. Not only this but also we’ll tell you how to access this rom into your device. However, my guide will help you to do that cumbersome work in just few minutes. So, Without wasting no more time let’s get into it. In addition to, Kindly read it till the end to get the correct knowledge.
Table of Contents
HIGHLIGHTS :
- About Android 10 (History).
- Which Devices will Officially get this?
- Installation and Configuration process.
- And many more, just stay connected and have fun.
Android 10 History
During the release in beta phase, the total of 6 beta versions were released. This program was expanded with the release of Beta 3 on May 7, 2019. Moreover, the Giant company Google had released Beta 4 on June 5, 2019 with the finalized Android “Q” APIs. Resultantly, On August 22, 2019, it was announced that Android “Q” would officially be formed as Android 10.
Pre-Requirements:
Kindly proceed only if you have fulfilled these necessities…
- Make sure that you’ve properly unlocked the device bootloader.
- Your Android device should be installed with a Custom Recovery like TWRP.
- Take a full backup of your device data. If anything goes wrong, you can restore the backup.
- Charge your device battery up to 60% at least for a smoother process.
Installation
At this stage, Comes our main task of installion. Follow the given steps in order to properly install the custom ROM without any error. One should note that installing a ROM isn’t an easy task , so proceed at your own risk we will not be responsible for any damage.
Follow these Steps –
Step 1. Firstly, Download the required ROM File of your device.
{NOTE – We’ve selected these devices as at the moment, ROM is available for only these. If your device isn’t present here, then kindly wait for some weeks. We’ll surely update this article soon.}
{If you haven’t pre-downloaded the required file, Firstly do that from the above given links}
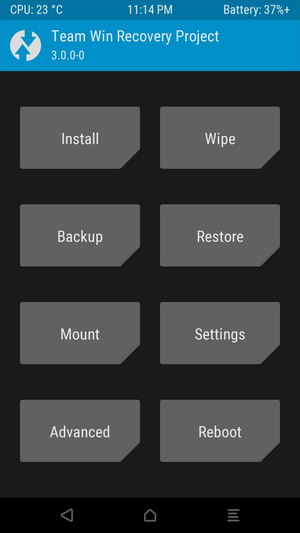
2. After downloading the required zip file, copy paste it in your sdcard or in Pendrive (if booting via otg). Then, Reboot into custom recovery mode. {TWRP Recovery is recommended by us}. Then, You will boot into Recovery .
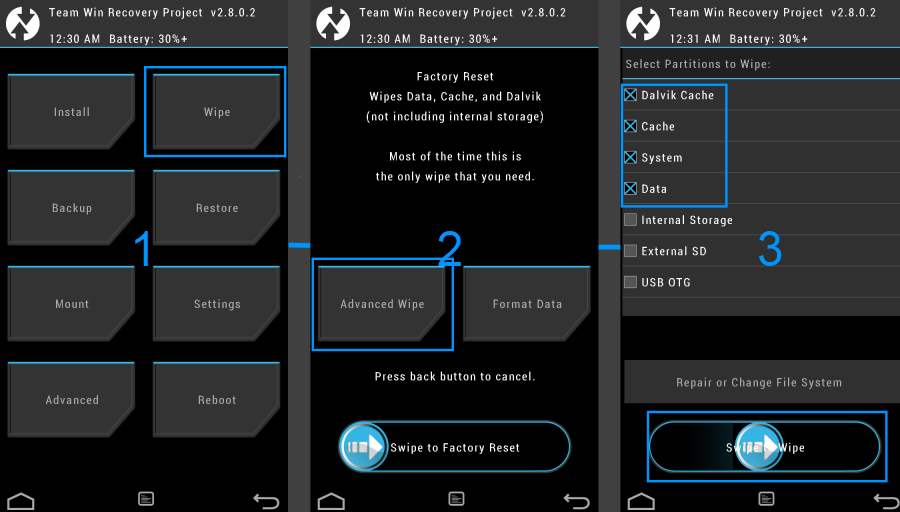
3.Then, Inside the TWRP menu, head towards Wipe section. In addition to, Select Advanced Wipe > Select the data, system, cache. Finally, wipe it.
4. Moreover, get back to main screen. Then, In recovery menu. Tap on Install button. Then, on Install Image. And, finally on Select the TWRP Image file from the location where you have moved earlier. However, Here we have pasted it in our sdcard. For instance:
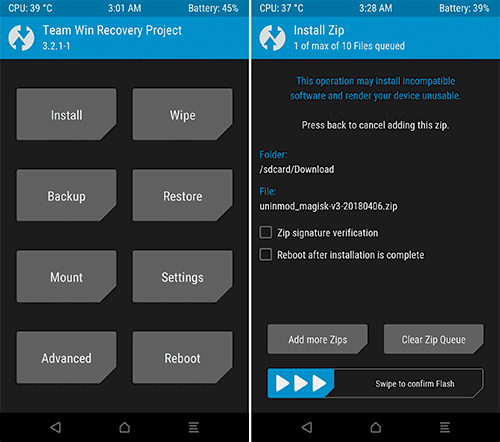
5. Later Swipe to confirm flash. However, it will take some time as flashing a rom isn’t a bed of roses for all of us.
6. However, If you want to flash G Apps as well. So,here’s the link – CLICK ME . Finally, reboot your phone into a new system. Then, you have to wait for it, as the boot process will take a few minutes and after you’ll succeed in flashing a rom. As a result, Enjoy! you have the ultimate ROM of Android 10 installed.

Conclusion
And here’s our tutorial to install Android 10 Cuistom ROM , as promissed earlier. Moreover, We will meet you in our another Tech Update Article. Till then Good Bye and don’t forget to SUBSCRIBE the newsletter. Do share and comment down below as much as possible. Also, Let us know your thoughts on Android 10 Supported devices in the comments section down below.
#THANKS FOR READING


Sir my smartphone device vivo y21l isnot listed up in the given list. how can i install this custom rom then? please i need that rom beecuase i want ot use darkmode of whatsappplease
Hey Agripadha, thanks for writing to us. As far as I’m concerned vivo devices including y21l isn’t compatible with Android 10 at the moment.Which means you can’t do that.Kindly don’t try to install that ROM as it will Brick your device.