It often happens that with one photo or screen we are not able to convey the whole sense or meaning that we mean. Of course, in this situation, we could record a short video, which would show exactly what it is about.
However, there is a better solution, namely screen recording in the form of GIF animations. In my opinion, this method is much better than recording a very short video file, because it is much easier to share a GIF file anywhere, and above all it takes much less space than a video file.
3 best programs to record image from the desktop to a GIF
Gyazo
Gyazo is one of the best tools that allows you to capture the screen in GIF format. We can record the entire screen or select only a selected area. By using the share buttons quickly, we can share our GIF animation on Facebook or Twitter. Follow the steps below to learn how to use Gyazo.
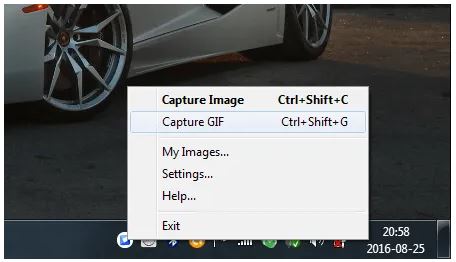
Step 1. First download and install Gyazo on your computer. The applications only take 16 MB. After installing, right-click the Gyzao icon on the taskbar and select Capture GIF . You can also use the keyboard shortcut Ctrl + Shift + G .
Step 2. Then select the area you would like to capture. Of course, you can select the entire screen, it does not necessarily have to be only the designated fragment.
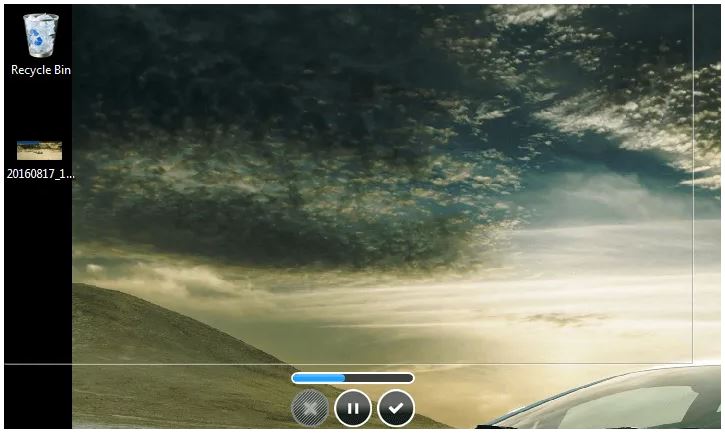
Step 3. After recording, a new tab will open in your default browser with the GIF animation you just made. All animations are automatically sent to the program’s server, where we can easily share or save them, and even edit them in a small way.
ScreenToGIF
ScreenToGIF is another tool designed for one purpose only, namely recording a selected part of the screen in the form of GIF animations. The program takes only less than 3 MB and does not require installation.
Step 1. Download ScreenToGIF and then unpack it using any compression program, eg Winrar .
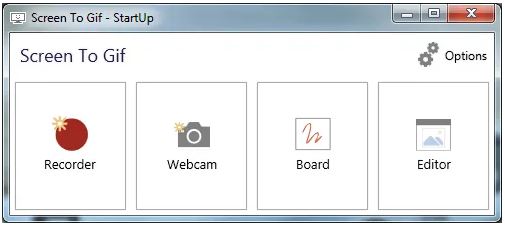
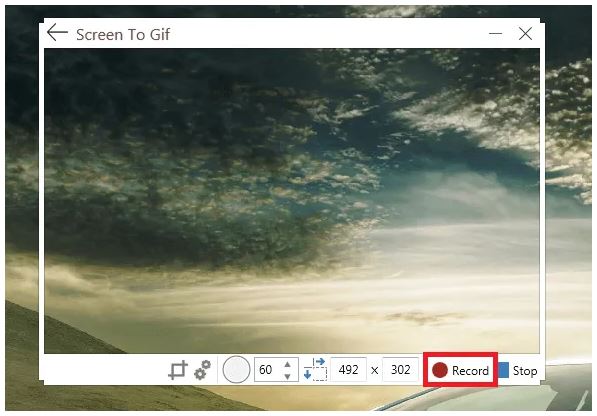
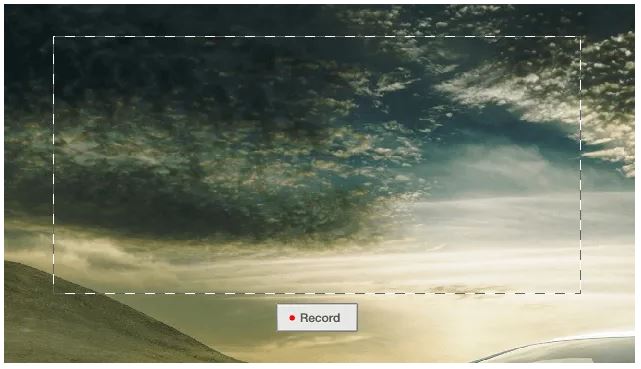
Step 2. Run the applications and then click ” Recorder “. A transparent window will appear that can be freely enlarged depending on the area you want to capture. Just click ” Record ” to start recording.
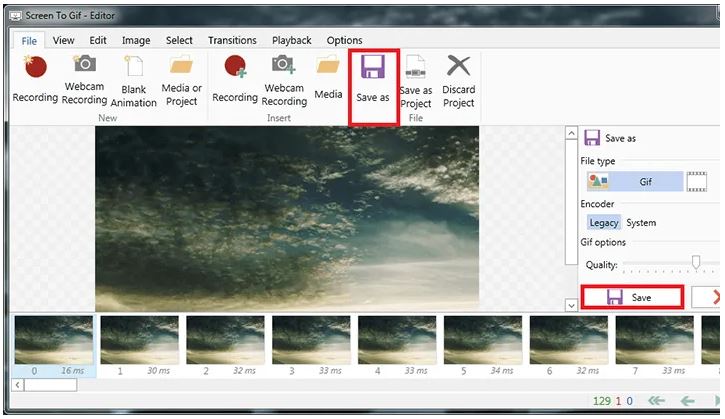
Step 3. After recording, a window will appear in which we can edit the recorded GIF and then save by clicking ” Save as “.
Recordit
Recordit is a very simple cloud screen recording tool. Has a client for Windows and Mac. The application registers the selected area of the screen, after which the entire record is sent to their server. The result can be seen directly in the browser.
Step 1. Download and install Recordit , after installation the program icon will appear in the taskbar.
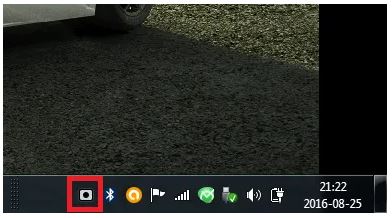
Step 2. All you have to do is click on the program icon in the taskbar, select the area of the screen to be recorded, and then click ” Record “.
Step 3. After the recording is finished, a message will appear in the lower left corner of the screen with information about sending our file to the server, just click to see your recording.

Step 4. A new window will open in the browser with the file we recorded. To save the recording in the form of an animation, click on the icon with the inscription GIF , which is located under the player, then right-click on the animation and select ” Save image as … “
These are all programs for recording the image from the desktop to a GIF file. If you know other programs that are better than those listed here, share them in the comment below.